How do I install a wireless network card?
Installing a wireless network card in your computer can vastly improve your browsing speed and convenience, enabling you to connect to wireless networks and roam freely without the constraints of wired connections. This article provides a detailed, step-by-step guide to help you install a wireless network card in your desktop or laptop computer.
Preparation
Before starting the installation, there are a few preparations you should make:
- Check Compatibility: Make sure the wireless network card is compatible with your system, particularly the operating system and motherboard.
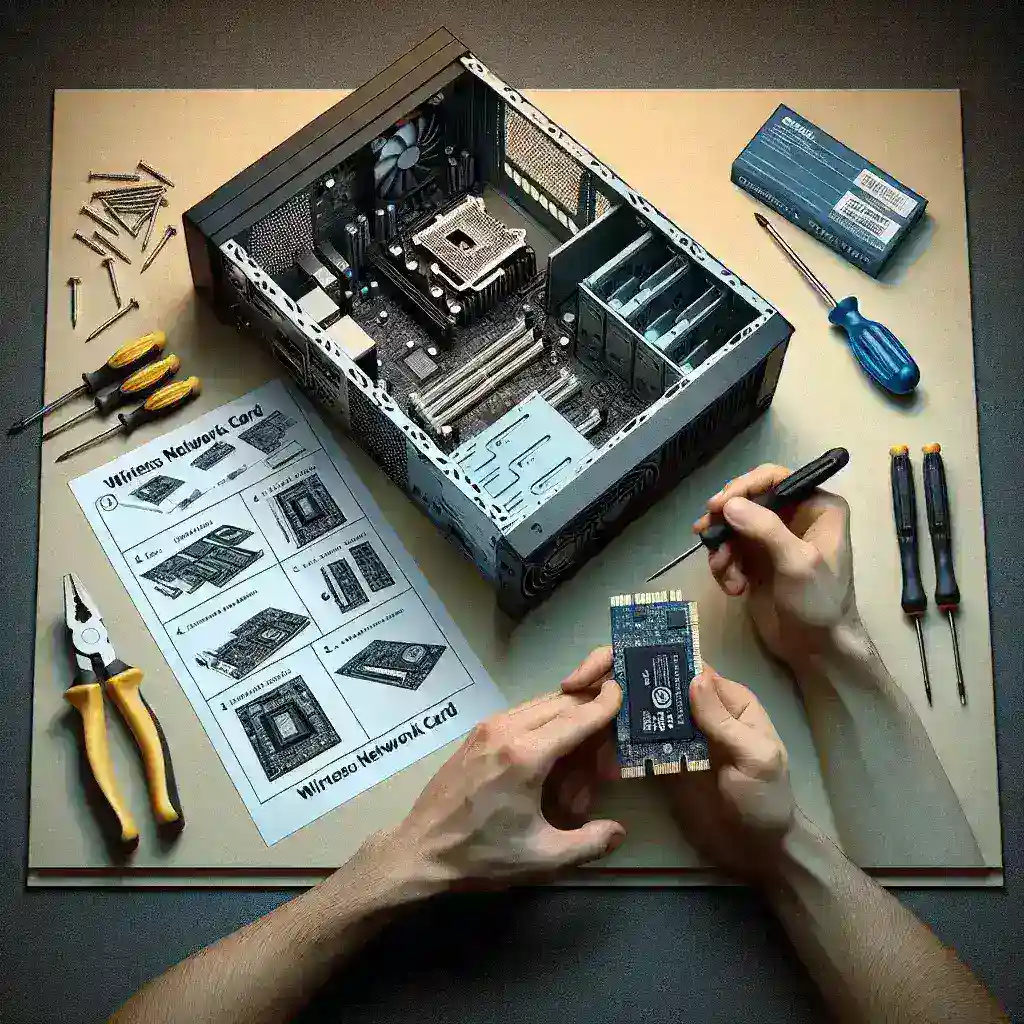
- Gather Tools: Typically, you will need a screwdriver to open your computer’s case. If you’re installing an internal PCI card, an anti-static wrist strap is recommended to prevent static electricity damage.
- Install Drivers: Download the latest drivers for your wireless network card from the manufacturer’s website. This ensures that you have the latest software to support the hardware.
- Backup Data: Always backup your data before making any hardware changes to ensure nothing is lost during installation.
Steps to Install a Wireless Network Card
Opening the Case (Desktop Computer)
- Power Off: Ensure that your computer is turned off and unplugged from any power source.
- Remove the Side Panel: Most desktop cases have screws at the back holding the side panel in place. Use your screwdriver to remove these screws and then gently slide the panel off.
- Discharge Static Electricity: Use an anti-static wrist strap or periodically touch an unpainted metal surface to discharge static electricity.
Installing the Wireless Network Card (Desktop Computer)
- Locate the PCI Slot: Inside the case, locate an empty PCI slot on the motherboard. This is where you will insert the wireless network card.
- Remove the Slot Cover: If necessary, unscrew and remove the metal slot cover corresponding to the PCI slot you are using.
- Insert the Card: Carefully align the network card with the PCI slot and push it in until it is firmly seated.
- Screw the Card in Place: Use a screw to secure the network card to the chassis to prevent it from moving.
- Replace the Side Panel: Once the card is installed, reattach the side panel and secure it with screws.
- Reconnect Power: Plug in your computer and power it on.
Installing the Wireless Network Card (Laptop Computer)
- Power Off: Ensure that your laptop is turned off and unplugged from any power source.
- Remove the Battery: To avoid electrical damage, remove the battery from your laptop.
- Access the Wireless Card Compartment: Locate and open the wireless card compartment, usually found on the underside of the laptop. You may need a screwdriver to remove the cover.
- Remove Existing Card: If there is an existing wireless card, gently disconnect the antenna wires and remove the card by easing it out of the slot.
- Insert New Card: Insert the new wireless network card into the slot at a 45-degree angle and push it down until it clicks into place.
- Reconnect Antenna Wires: Reconnect the antenna wires to the new card. The wires are usually color-coded to match the terminals.
- Replace Compartment Cover: Once everything is secured, replace the cover and screw it back in place.
- Reconnect Battery and Power On: Reattach the battery, plug in your laptop, and power it on.
Software Installation
- Install Drivers: Once the hardware is installed, load the drivers for the wireless network card. If you have downloaded the latest drivers, simply run the installer and follow the on-screen instructions.
- Restart the Computer: It is recommended to restart your computer after installing the drivers to ensure everything is configured correctly.
Configuring the Wireless Network
- Open Network Settings: Once your computer is powered on, open the network settings from the system tray or control panel.
- Connect to a Network: Your new wireless network card should detect available wireless networks. Select your desired network and enter the password if required.
- Test the Connection: Ensure that you have a stable and strong connection by browsing some websites or performing a speed test.
Conclusion
Installing a wireless network card is a straightforward process that can significantly enhance your computing experience by providing faster and more convenient internet access. By following the steps outlined in this guide, you can easily install a new wireless network card and enjoy the benefits of wireless connectivity.